Tuesday, January 16, 2018
NONESUCH BIRDSONG STUDIO: INKTENSE WATERCOLOR PENCILS AND an OLD QUILT
NONESUCH BIRDSONG STUDIO: INKTENSE WATERCOLOR PENCILS AND an OLD QUILT: SPRING HAS SPRUNG designed by Karen S Riggins, 1995 Paper pieced and applique This photo shows the quilt on top of a Nine Pa...


INKTENSE WATERCOLOR PENCILS AND an OLD QUILT
SPRING HAS SPRUNG
designed by Karen S Riggins, 1995
Paper pieced and applique

This photo shows the quilt on top of a Nine Patch that I made in 1979 out of double knits and othe fabrics. I machine quilted it a few years ago when it needed a new back.
I recently pulled out a small art quilt that I had made from a paper pieced pattern of my design, in 1995. It hung in our garden room for a long time, until I realized how faded it was getting to be. Not knowing what to do with it, I stored it away in the pie safe where I have other quilts stored. When I got it out this last time, the thought occurred to me to try bringing it back to life by painting the fabrics with watercolor pencils. That's all I was going to do, was use watercolors to bring back the color in the fabrics.
I used a combination of Derwent Inktense Watercolor Pencils, cheaper watercolor pencils and Prismacolor Pencils along with a fabric medium made by Golden products, GAC 900 medium. The medium intensifies the colors and blends them while also sealing the paint.
Here's a photo of the quilt partially painted. It's already starting to look much better.

This is a small quilt, only about 20" square, so it was easy to think about painting the flowers. That said, it's such an easy process and one that does not destroy the original integrity of the fabric, that it might be something to consider doing to a larger quilt that is faded but still in great condition.
There is one issue that needs to be paid attention to and that is, making sure the paint does not bleed into the background fabric. It just means being very careful with the medium when brushing it over the paint.
Here's the quilt after all of the painting was finished.


This photo shows detail of the painted flowers.
At this point, I tossed aside the idea of only painting the quilt and decided to quilt over the original quilting with metallic thread and to add in some beading detail.

Here is a closeup of the flowers after being quilted with the metallic thread and beading added to them.
Here's the completely finished quilt:

I highly recommend this little quick fix for any quilt that you still love but that is looking a bit faded. I really love this piece now. It looks like "Spring has Sprung" again newer and better.
Creating Always,
Karen
“Natural focus occurs when the mind is interested. When this occurs, the mind is drawn irresistibly toward the object (or subject) of interest. It is effortless and relaxed, not tense and overly controlled.” (W. Timothy Gallwey)
Friday, January 6, 2017
MONO-PRINT WITH LIQUITEX FLOW MEDIUM

In my previous post I discussed mono-printing some small pieces of fabric and then stamping more design onto of them.
I've been experimenting with capturing small felted pieces on canvas, with Liquitex Flow Medium. The above photo shows what happened when I used one of the pieces of mono-printed fabric.
There were several steps involved. First of all, I had to paint the canvas background. I did that by mixing turquoise, blue, and gold paints into puddles of Liquitex Flow Medium and then pouring those puddles onto the canvas.
The important thing to remember, as you pour the medium onto the canvas, is to have the canvas perfectly level. The medium needs to flow evenly across, over and off of the canvas.
I supported my canvas on some small plastic bowls, placed on an acrylic sheet. It's important that the canvas be perfectly level so the medium can flow evenly across the canvas. My canvas was on a perfectly level table
Once the paint had covered the canvas and started to set up ( this took about one hour in my studio), I placed the fabric onto the canvas. I gently poked it down level into the medium. I made sure the edges were covered with the medium. Two of the edges curled up and I left them that way. I then left it to dry.
Here is what it looked like :
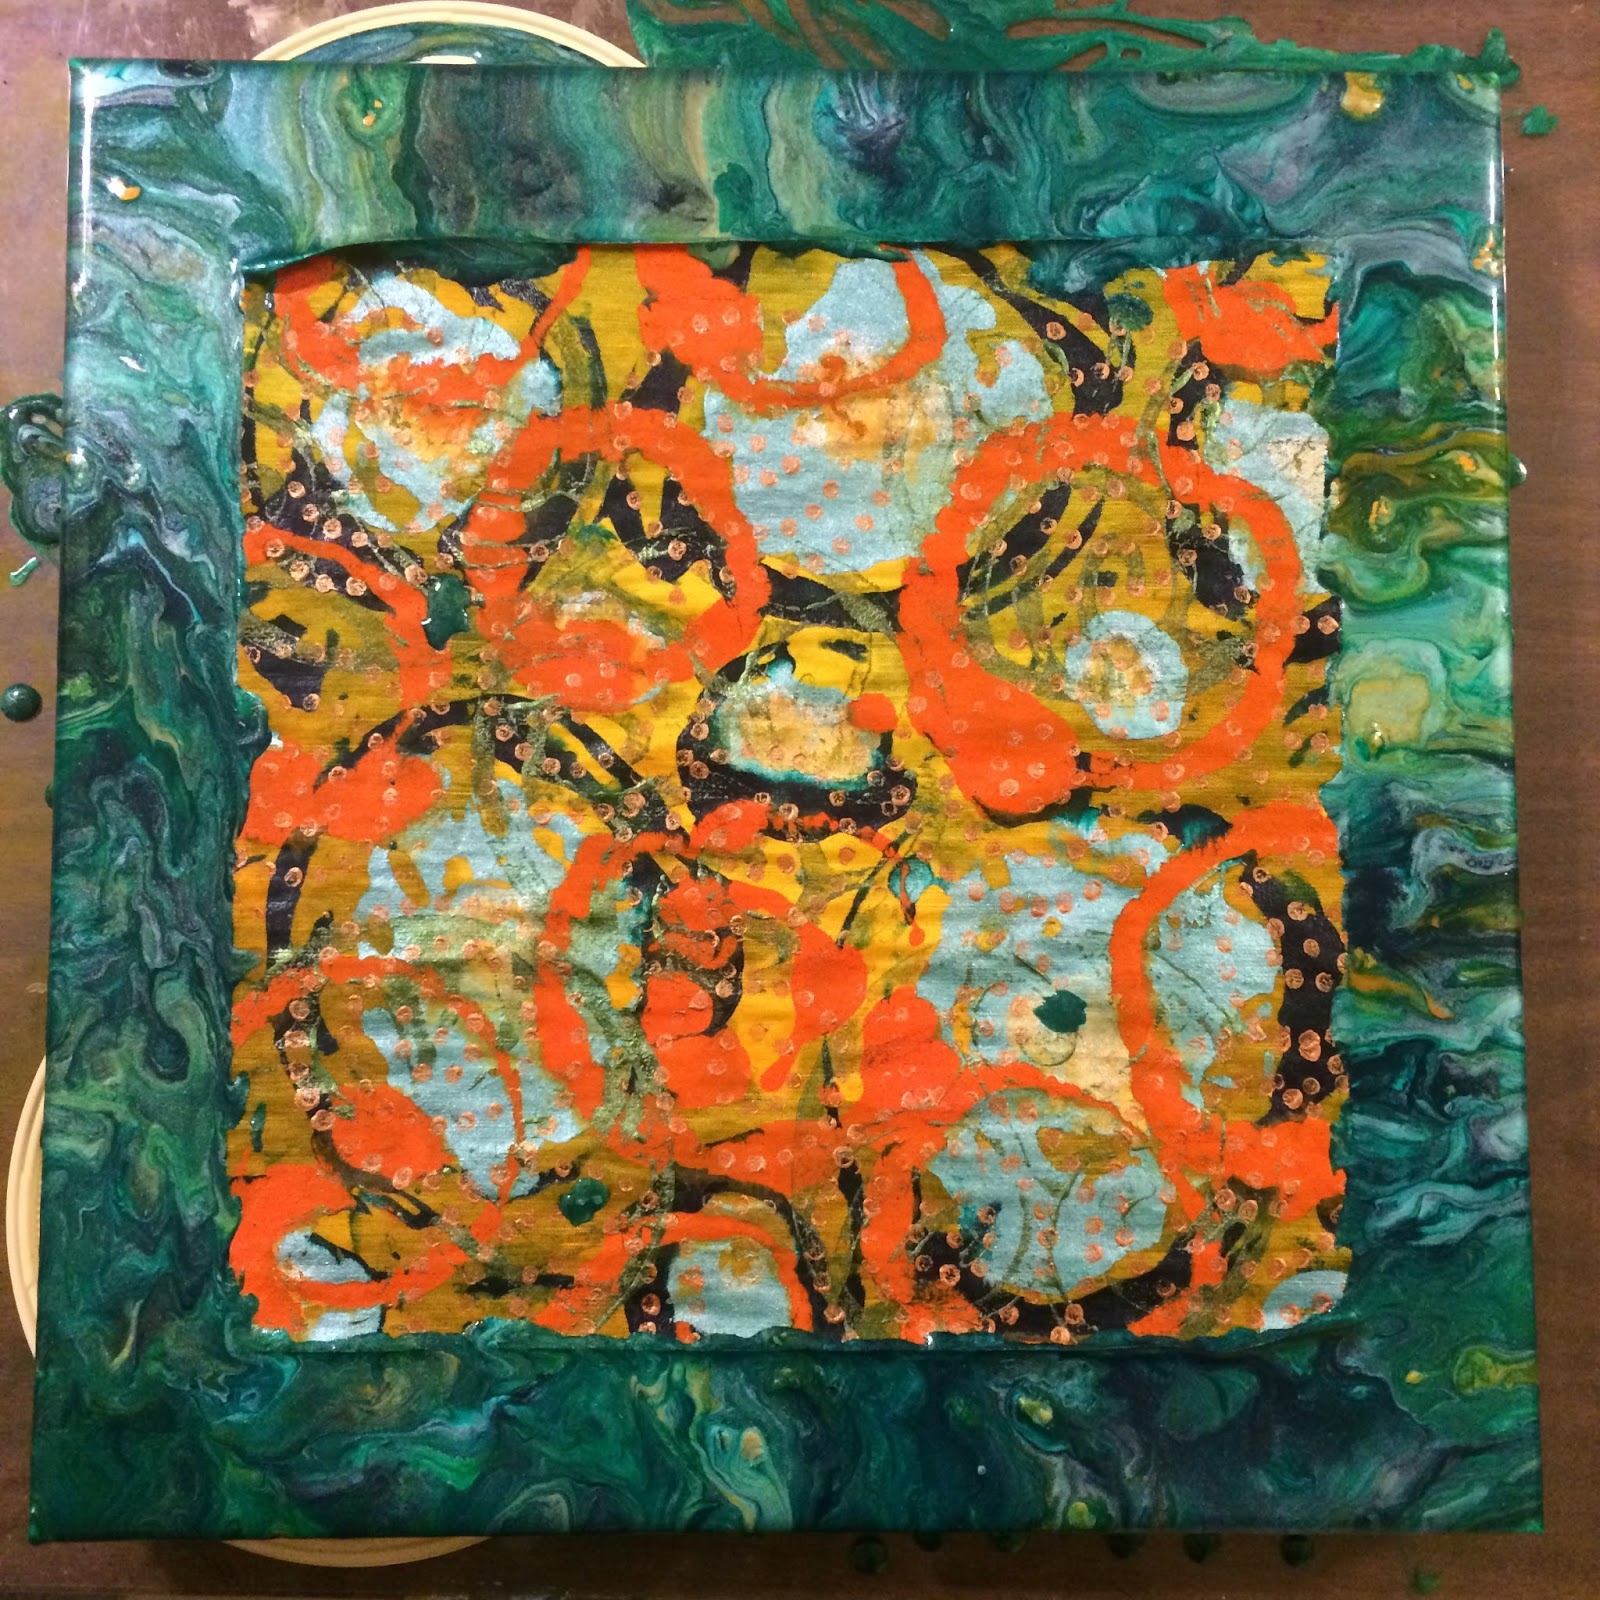
You can see where some of the paint has puddled onto the acrylic sheet on the table.
After about two days of drying, I covered the whole piece in clear Flow Medium. I then left it to dry for about another 3 days. It's critical that each layer has time to dry completely.
I then covered it with a third layer. As this layer was drying, I placed various mother of pearl shells into the medium. Once everything was dry, the shells were permanently held into place.
I am really loving the 3-D look this process creates.
Create Always,
Karen
Thursday, January 5, 2017
MONO-PRINTING and STAMPING
This is the first printing. This base fabric is an 8" square piece of hand-dyed silk/linen fabric.

After the paint dried, I over stamped the whole thing.

There was still paint left on the acrylic sheet that I was using for the mono-printing, so I laid a piece of hand-dyed cotton on it. Again, after it was dry, I overstamped it, but, this time I also hand painted in the purple dots.

I printed one more piece using a hand-painted piece of silk/cotton blend.

Again I stamped this piece to give it more texture and interest.

It was very interesting to see how the different fabrics took the paint and to see what happened with progressive printing on the same plate and without adding more paint.
What I ended up doing with the first and third pieces was very interesting and fun. I captured them on canvas, using paint and flow medium.
More details coming later.
Creating Always,
Karen
Friday, December 30, 2016
PLAYING WITH LIQUITEX FLOW MEDIUM

I"ve discovered something new and fun. It's LIQUITEX FLOW MEDIUM. I was just playing around on You Tube one day and videos came up showing this medium being used with acrylic paints, on artist canvas.
Of course, my first thought was "what would happen if I used the medium with paint and fiber.
The piece pictured about was constructed using acrylic paints, inks, a hand felted piece that has a ceramic bead trapped in it and, the flow medium.
I first "painted" the six inch square canvas by mixing some paint with some flow medium and pouring it onto the canvas.
Note that the canvas must be level in all directions.
In this photo, the paints are just starting to flow across the canvas and drip onto the parchment paper that is under the canvas. I have the canvas elevated on stoneware bead dishes that will be easy to clean up.

Once the medium and paint had covered the canvas and started to slow and thicken, I laid a hand felted piece onto it and let it all dry for about two days.
I then poured more medium over the whole piece. As the medium started to thicken and set up I had to carefully pick at part of the felted piece to make sure it did not go all flat. Then it had to dry for about another two days before I added one more layer of medium. I also added in a few drops of acrylic gold ink.

Each layer of medium needs to cover the whole piece and drip down the sides, if you want the surface to be very smooth.
This technique gives a very three dimensional or underwater look that is really fascinating, at least to me.
There is no real control of how the paint will flow, and I like that.
Here is a second piece that I did, also using a small felted piece to add dimension. I added gold ink and green metallic paint after putting on the third layer of medium. This piece is 5" square.

Next I am experimenting with mono-printing fabric and covering it with flow medium.
Be sure to watch for the posts.
Having fun in the studio in Nonesuch,
Karen
Sunday, October 2, 2016
ECO-PRINTING 3: UnWrapped and Beautiful!
Well, I finally got the scarves unwrapped, well over a week ago. I let them dry, rolled up on the pipe, until the surface was very dry and it was clear that some of the dye had migrated to the surface.
Here's what they looked like:

I finally decided that I"d better just go ahead and unroll these three, because I didn't think they would ever dry all the way through. In the process of unrolling, I realized that I might have tied the string just a bit too tight. There were white marks everywhere the string had been in contact with the fabric. This photo shows how the the outside of the scarf is much darker than the inside. It also shows some of the botanical pieces that I used.

Here are the three scarves, ironed and hung up for display. You can see, in the upper corners, where some dark color had migrated to the outside of the scarf and where the string prevented the color from penetrating. I rather like the look, especially when I'm wearing a scarf.
You can also see that the effect of the leaves is very subtle.

Here are some close-ups of the printing that I achieved.
This one was done with Passion Flower Vine leaves. They showed up better than any other leaves or flowers that I used.

I did use some rusted iron in the pot, so, I think the dark colors are from the iron pieces. I can't really tell what else I used on this piece, but I do like the subtle design that resulted. I"m really loving those white lines that are a result of the string being so tightly wound around the fabric.

On this one, I used Marigold leaves from old fashioned, giant marigolds. I also used the blossoms but I did not get any results from them.

I did not use any mordants other than to put the items in an aluminum pot and to add several pieces of rusted iron. It will be interesting to talk to others and show them these pieces, when I attend a workshop in a couple of weeks.
This has been a fun process and I really want to try it again. One other thought, these pieces can all be overdyed, stamped or painted, if a more defined design is wanted.
Hmmm, A bit of gold stamping might be really nice.
Create Always,
Karen
Monday, September 19, 2016
ECO-PRINTING 2
Well, the ECO-Printing experiment is still going on.
I took the pot out to the driveway this morning. Here's what the brew looked like before I pulled out the four bunches. The brew was much darker than last night.

I put on some rubber gloves and began pulling the bunches out of the pot. I laid three of them on a rack to dry in the sun.
I unwrapped the fourth one and hung it on the line. Here is what it looked like.

It was pretty pale and dried even paler.
I just checked the bunches and they are still pretty wet. What I did discover is that the darker parts of the plant dye are migrating to the tops of the folds.

I hope they dry completely tomorrow. I am very excited about what might be happening.
There's no chance that this pressure cooker will ever be used again for food. I put the gloves, pieces of iron and extra twine in the pot, placed it in the shop and left it ready for another session.

Looking forward to tomorrow and the big unwrapping!
Create Always,
Karen
Subscribe to:
Posts (Atom)