Thursday, January 24, 2013

NOW APPEARING - A FINISHED UFP! OH YEA !


 NOW APPEARING -  WILDFLOWER WAKE ROBIN TRILLIUM
ANOTHER FINISHED UFP!


I designed this hand applique pattern several years ago. The flower was originally hand appliqued and embellished with embroidery, on a ( what was I thinking) a very boring, beige  background. 
I added on some borders and, that was the end of the story, or so I thought at the time.
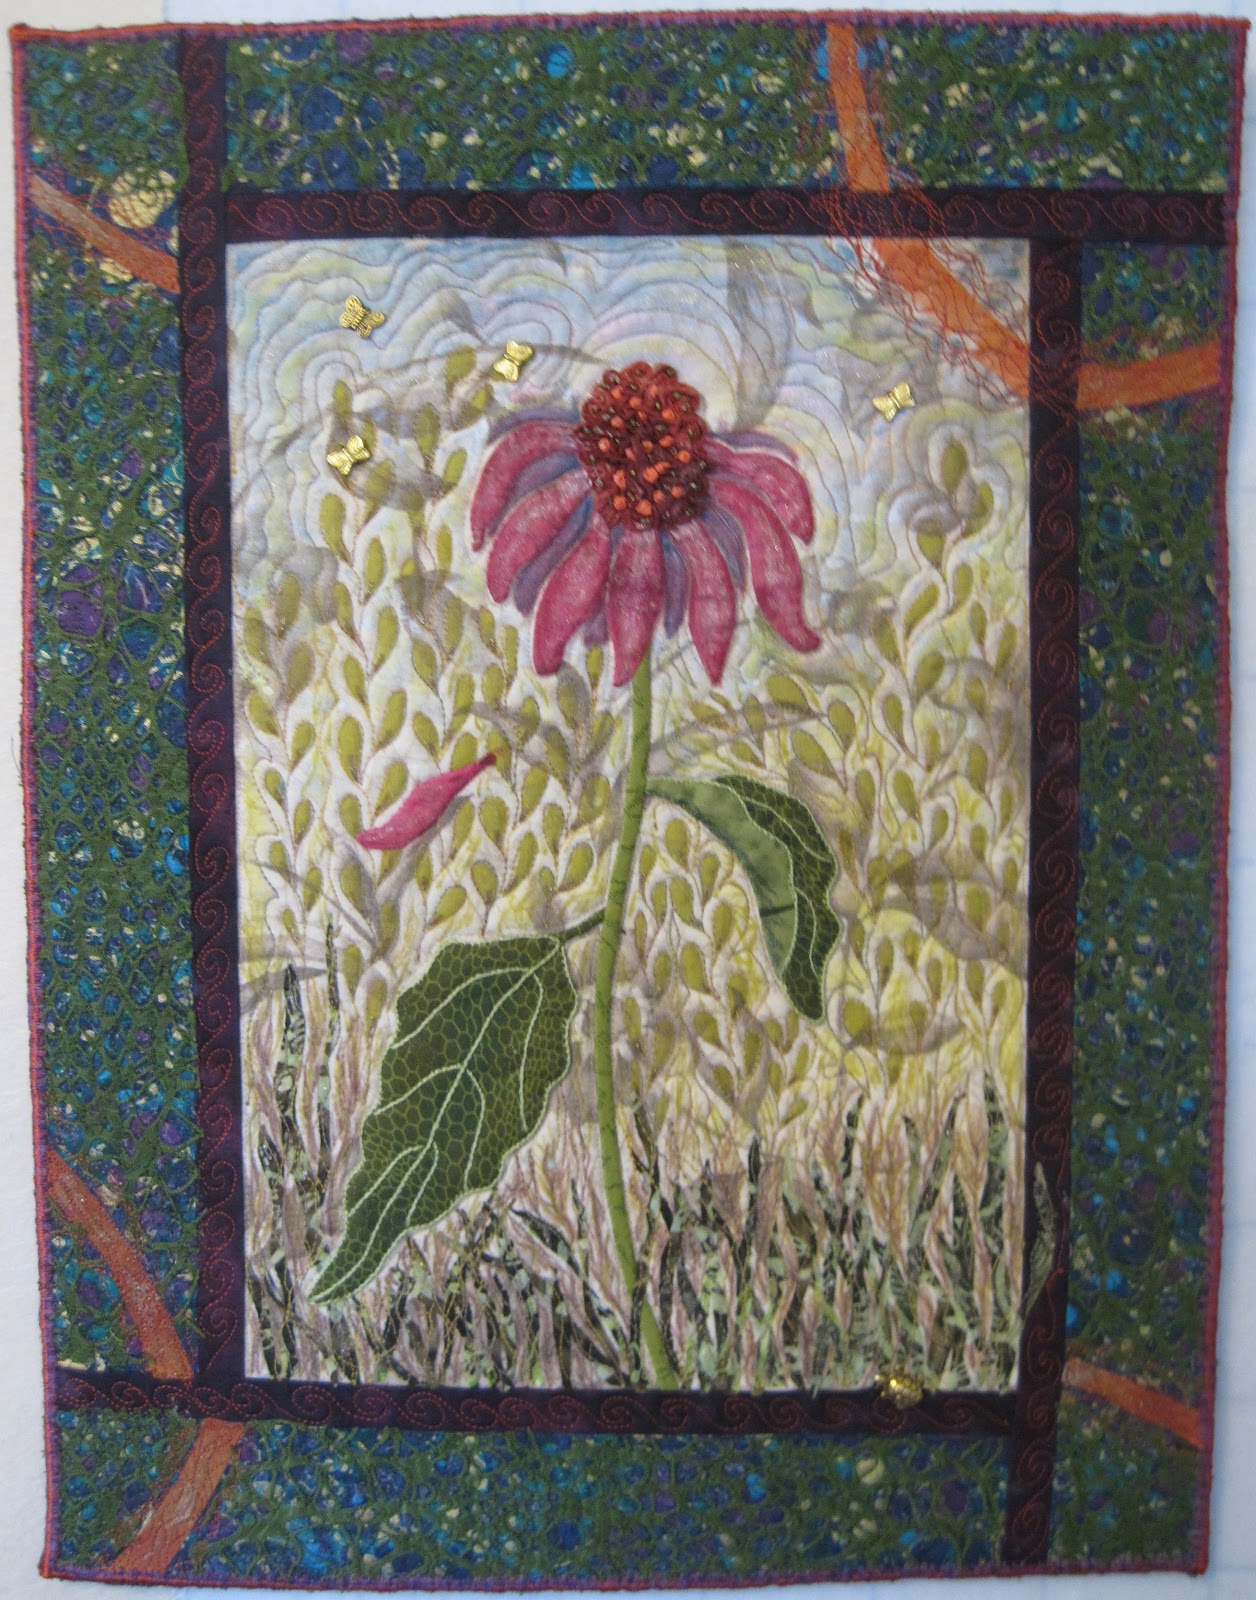
Here is the recently finished piece.


 Here is the project as  I was starting to make changes to it. 

It occurred to me, that, trilliums come up in the woods through layers of old leaves and sticks and under bare trees, so, trees and sticks were added. 


 The trees are cut from brown dupioni silk that was backed with misty fuse. I just free-hand cut them out using a mini-rotary blade cutter and fused them into place on the background.

The old leaves and sticks were also cut out of a variety of  fabrics that had Misty Fuse on the back of them. I could cut little pieces, again using the mini-rotary blade knife and layer them into place , until I had the right depth and balance. Then I fused everything down.


 I free motion quilted the tree trunks with wavy, "barky" lines and the background the same way. The inner border was quilted with leafy vines. I filled in the leaves with a green Pitt Artist Pen. The pen ink is translucent, so, it just gives a very light impression of foliage while highlighting the quilting.

The dark brown outer border is quilted, in black, using a free motion  rock pattern.


I then used Prismacolor pencils to shade in the background and add more depth to it. I am in the process here. The right side has been shaded in.

Using Pastel Crayons, I added highlights to the flower petals, the leaves and the tree trunks.


 This photo is a "before " shot. Notice how flat everything looks.

I quilt the background with a variegated thread but it didn't add enough umph to it.


 I had earlier, finished the inner border off with a satin stitch edge of variegated purple thread.  The color was not a good match with the flower so I went over it with black thread.

Just enough of the original color shows through to carry the petal color out from the center of the quilt.

I added amber glass beads on the trees and ground. 

A frosting of glittery ink is on the petals and the ground. 

All finished ? Not quite.


 Using white and gold iridescent Shiva Paint sticks, I added further
highlights to the flower petals and leaves and the background.
 The dark brown border was way, well....TOO DARK.

So, I went lightly over it with the gold Shiva Paint Stick.

The satin stitch is a built in decorative stitch on my machine. 


VIOLA! A BEAUTIFUL FINISHED PIECE
Size: 11.5" x 15"


 It's been fun taking these small projects and experimenting with a new techniques on them.
Be sure to watch for more postings about UFP's from the studio.

LOVE your work and revel in your CREATIVITY ! 

Until next time,

Karen

Tuesday, January 15, 2013

WHEN THE TIME IS RIGHT!

 WHEN THE TIME IS RIGHT!
Finishing UPF's (Unfinished projects)
 
I've recently been pulling out some old projects, that got stashed into a drawer and never finished.  These are pieces that I liked, at the time, but, was also bored with them and not sure where I wanted to go with them.  Since I started some of these UFP's, I have learned a lot more about being creative and using a variety of supplies, that I wouldn't have owned much less had the courage to use. 

It's fun to be able to put new skills and collected supplies into action.

This Cone Flower piece was the first one I pulled out.
This photo shows it with some changes I'd already made, when  I thought to start taking pictures of the process of finishing it.

It was originally just the flower with the burgundy and blue border. Yuck!

Bits of grass have been added, using Misty Fuse, to give some weight to the flower.  I used a Faber-Castell artist's pen to add bits of brown seed and grass into the green fused grass.
Orange bits of hand dyed silk give some vibrancy and whimsy to the border.


 I free motion quilted a grass with seed heads design and did some echo quilting around the flower head.

The seed heads weren't showing up, so, I colored them in, again using Faber-Castell artist's pen.


I used an orange rayon thread to quilt the free motion spiral design into the narrow burgundy border. The same thread was used to quilt the orange strips in the border.

After rummaging around in my "trims draw", I came up with this green, lacy trim that I quilted onto the border.  It subdued the original blue fabric and gave texture to the border, which complimented the grass.


The width of the green trim convinced me of what I already suspected - the blue border was too wide.

I trimmed to the edge of the green lacy trim.


Using pastels, a glittery All Purpose ink and the Faber-Castell pens, I added in shading on and around the flower, the grass and in the "sky".

The edge was finished using a tri-loble polyester, thread and a free motion zig zag stitch.

Metallic butterflies and a turtle were sewn on.


 Before finishing the edge, I fused a piece of heavy duty interfacing onto the back of the quilt.  Then I caught it in with the edge stitching.  The interfacing gives enough stability to allow the quilt to be hung with a cord made out of crocheted Fire Line.

I was also able to sign the back of the quilt.  

The piece measures 11"x 17".


It has been donated to the Berea Arts Council Art Auction Fundraiser.

The opening reception is Friday, January 18th, 5:30 to 7:30 pm, the Berea Arts Council on Main St. in Berea, KY

 As you are taking classes and buying goodies at the local quilt shop or a quilt show, remember , you will use all that knowledge and those supplies, when the time is right !
                                                                                                 Enjoy,  
                                                                                                       Karen ;-)