Sunday, January 24, 2016

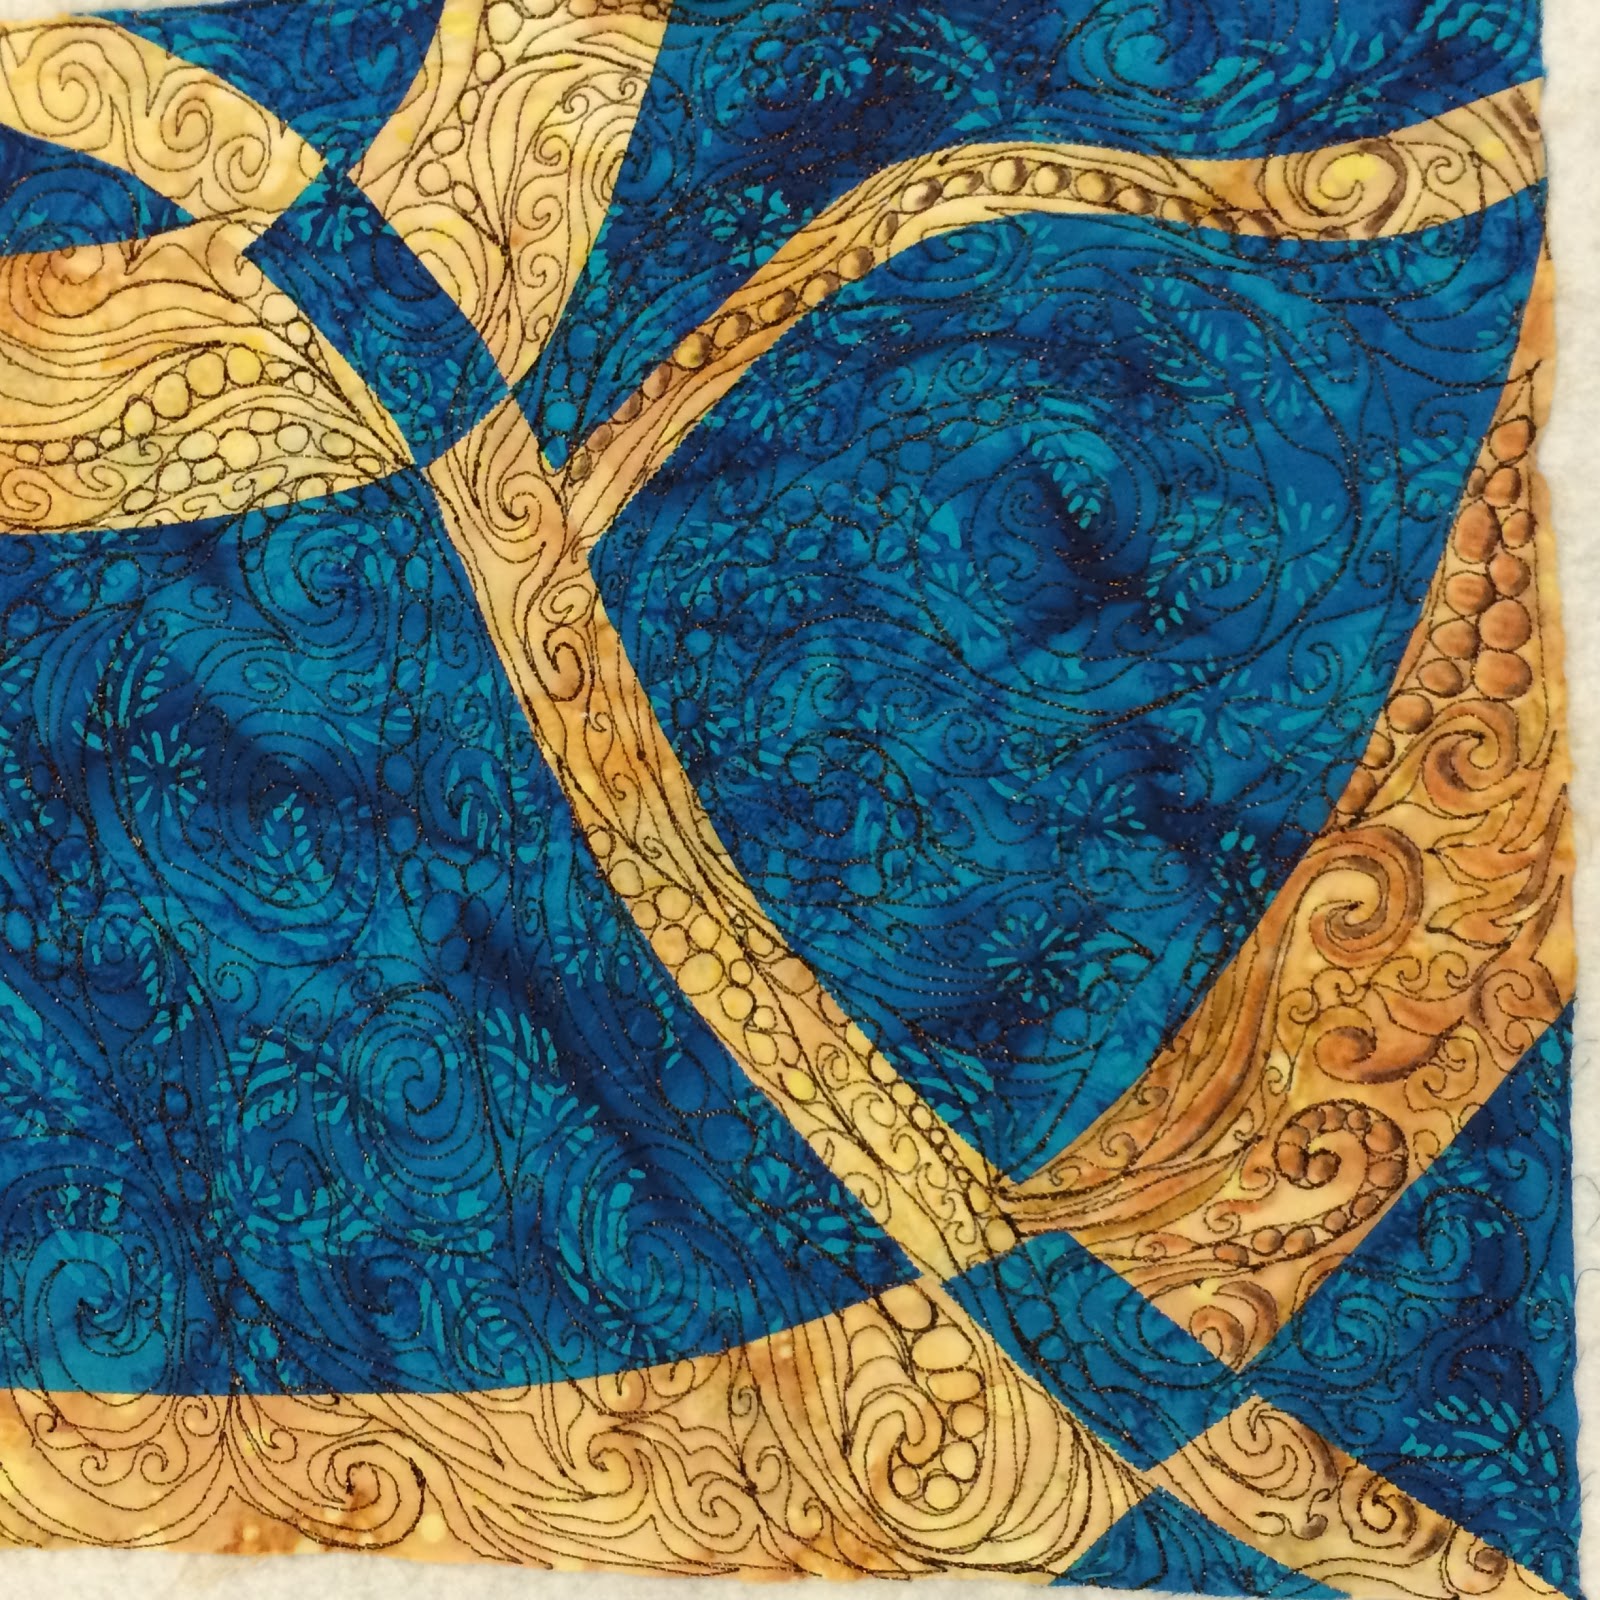
FRACTURED WATERCOLOR GARDEN: Embellishing with Inktense Watercolor pencils


This piece builds on the "FRACTURED WHEEL" pieces that I published earlier.  In this case, I created two mirror image pieces, quilted them and then "painted in details" before slicing the pieces apart and.... 


Starting at Step One: 

I created the Mirror Image squares using two batik prints.  I used a Bronze metallic thread, FS20 by Madiera Threads.  Here are two photos of the quilting,  and with some embellishment started.


 Before I get into working with the Intense Pencils, I'm backing up to the quilting process.  The quilting on the blue/beige piece was done through freezer paper.


I freehand drew a design then ironed the freezer paper onto the quilt sandwich.  It was very easy to quilt through the freezer paper and I already had an idea of what the design would look like. 


 However, getting the paper peeled off was a real job!  So, for the second square, I figured if I can draw a design freehand with a pen, then I can do it with the machine, so that's what I did.  


I colored in the quilted areas with the Intense Pencils after I finished the quilting. After each section was colored in, I went over it with Golden Fabric Medium GAC900. That smooths out the color and and makes it brighter. It also allows for the blending of colors. In some areas I added in highlights after the medium had been laid down.  The medium also makes the colors permanent, once everything is dry.  I did find out that I had to be careful not to do too much at one time. Bleeding of the color can occur if the fabric gets too wet with the medium.  I only used the color pencils on the beige fabric.


Once everything was dry, I added in white highlights using white acrylic paint.  I also used a metallic white paint to embellish the narrow blue pieces.. Unfortunately, that doesn't show up here but it does in the final piece.


So, after doing all the quilting and the painting, I split the pieces into strips. That's right, I took two finished pieces and cut them apart into strips! 


Here the strips are alternated with each other and ready to be fused to a backing. Trying to seam the pieces together would have taken away from the design and added too much bulk to a small piece.  It finished out at 16" by 20".  


 You can see the white painted highlights on the narrow blue fabric pieces.

After fusing the pieces to a background, I free motion sewed over the seam joinings and then covered them with a bronze colored yarn that was like a silk cord.  I had already embellished each seam line with the same yarn.  


I also decided to add in some bronze highlights on the blue fabric.  I used Lumiere Bronze Metallic paint by Jaquard.


This was a fun way to practice a couple of new techniques and experiment with painting on a quilted piece using both acrylic paints and the Inktense Watercolor pencils.  This method also works well with Prismacolor pencils.  I happen to like the more intense colors that I get with the watercolor pencils. 


I also like working  with printed fabric rather all white fabric. The addition of the fabric print really increases the depth of the design.


 I also love the movement that was  achieved by cutting the squares into strips and then alternating them into a design that weaves in and out with itself.


I love this very elegant piece of art work.  

CREATING ALWAYS IN JOY,

Karen


Wednesday, December 2, 2015

FRACTURED WHEELS #1 and #2


NOTE about colors: The true colors of these pieces are somewhere between the light and dark in these photos. 

These two 12" squares started out as the answer to the challenge of interpreting a photo of  an old wheel. 

Here's the photo of the old wheel. The photo was taken by a member of the Creative Camera Club of Lexington. Unfortunately, I do not know the name of the photographer. Their photo is being used in conjunction with the Quilt Artists of Kentucky on the Quiltography Project 2015-2016.  Those of us who have chosen to participate must agree to interpret a published photo in whatever style we see fit, as long as the piece is 12" square.


I started with two squares of fabric, one from a light colored commercial batik and one a dark color. In this case beige and blue.  I free hand cut the squares into curved pieces, then switched out the pieces to create two blocks. I pieced the blocks and then quilted them. I free motion quilted, using my home Bernina Machine, with Madiera FS20 Bronze metallic thread.

After quilting each square, I cut circles out of them and placed them into the alternating piece. I used a wide zizag stitch to anchor the circles into the holes.


Once I had the circles anchored into the holes I started adding embellishments.  Fuzzy yarn outlines each shape in the piece with the light background. Shiny ribbon outlines the shapes in the piece with the blue background. 

  I found some lamp glass beads, glass leaves and glass chips to use on the pieces. Even after I started  adding in the beading,  everything looked a bit dull still, so, I decided to see what would happen if I colored in each of the circles with water color pencils.  You can see where I started with the circle in the lower right hand corner.


In these photos you can see how I shaded in each circle and then painted a white highlight on each circle. I also painted the grass.


After coloring in each area, I went over everything with Golden GAC 900 fabric medium. The colors blended beautifully and were deepened in shade.

Last of all, I added in some painted highlights to the blue pieces. 

The square with the light background is my official entry into the Quiltography Challenge.  All of the work will be on display next November in downtown Lexington, along with the original photos. 

These two pieces were so much fun that I decided to see what would happen if I created two more squares, painted them, fractured and then put them back together. 

I ended up with FRACTURED WATERCOLOR GARDEN. 


More about that in another upcoming post. 

CREATING ALWAYS with JOY,

Karen


Saturday, November 7, 2015

FLYING SWALLOWS BARN QUILT


I designed and made this small quilt to give as a door prize at the Woodford County Barn Quilt Road Rally. Folks have come in from all over to drive our back roads and take photos of our barn quilts. 


The piece is an interpretation of our Barn Quilt which is based on the "Flying Swallows" quilt pattern. Our barn quilt is 8' square and is quite a presence on the landscape. Over the last few years, I have talked to several people who stopped to take photos of it. One day, I went out to say hello to someone and it turned out to be a quilter that I had met many years ago at a Kentucky Heritage Quilt Society Getaway. We remembered each other immediately.


The pattern is a difficult one to draft and even more difficult to hand piece ( I wouldn't even think of trying to machine piece a twelve inch square), so, I drafted it on freezer paper, ironed the freezer paper with the drafted design onto a piece of white cotton, made a quilt sandwich ( or should that be a quiltwich?) and quilted in the basic lines of the pattern.

I then proceeded to color in the different shapes using Derwent Watercolor pencils.


This photo shows the shapes all colored in and the colors sealed with Golden Fabric Medium.  I am adding in more detail quilting.  


Here is the piece with the rest of the quilting. At this point, I am also ading in another layer of color using more of the water color pencils and fabric paints by Stewart Gill.


To finish up, I beaded in small clear crystals where several of the points come together. I finished the edges with a black ribbon and satin stitch edge.  I then mounted the piece onto a 12" square artist canvas on which I already painted the edges black.  


Hopefully, whoever gets to take home this little "Barn Quilt" will really enjoy it. I certainly enjoyed making it. Now that I think of it, it would be fun to make someone elses Barn Quilt for them. 


CREATING WITH JOY and PASSION,

Karen


Monday, November 2, 2015

IRONS

IRONS for the STUDIO


 The other day I started to iron a piece of silk. I plugged in my iron, a Retro Black & Decker that I've had for at least 15 years, let it heat up and then started to iron the damp fabric. The iron was barely lukewarm. 


Well, I thought, I have put it to good use over the years, with the setting mostly on cotton and linen, so I figured it must be time to invest in a new one. 


 I remember that I paid $25.00 for this one,  at a local appliance store that is no longer in business.  I also remember thinking that I had gotten a really good deal. 


Here was an iron that was not going to keep turning itself off while I was trying to use it.  I also knew it was going to get hot enough to seriously press cotton fabrics, plus, I was tired of spending big bucks on irons that didn't last over a couple of years.


I didn't even know if the iron was still being made, so, I decided to check for it on Amazon. Yep! There it was and for only $21.95.  Since it takes me 45 minutes to drive into town from our farm, I went ahead and ordered the iron. 


While I waited for the new iron to arrive, I decided to check the extension cord that I had been using on the old iron, which was still in the studio.  That's when I discovered that the extension cord had somehow gotten pulled partway out of the wall socket. 


Once I had it plugged in all the way, the iron heated up and worked like a charm. 


The new iron arrived the next day and I'm keeping it. It has a lovely, shiny clean sole plate on it. The old iron has seen some rough use with embellishments that had created dark spots, on the sole plate,  that just will not come off. 


So, now I have an iron to use with melty, sticky stuff and one for clean fabric. 


Does it get any better than that for a fabric artist? Actually, yes, but that's another topic.


Create Always,

Karen


QAK QUILTOGRAPHY CHALLENGE 2015/2016
INTERPRETING a PHOTO of a LEOPARD

The Quilt Artists of Kentucky have started a new Quiltography Challenge using photos taken by members of the Creative Camera Club of Lexington, KY. We will be exhibiting our interpretations of the photos, along with the photos, in November of 2016.


Here is the first posted photo:


  I wanted to try a new fabric manipulating technique, that was posted in the blog "and Then We Set It On Fire", that creates permanent bubbles, creases, folds, etc. according to how the fabric is stitched.  I chose a synthetic gold organza and used stitching around rocks to create a variety of bubble sizes and shapes.  This technique only works with synthetic fabrics that are sensitive to heat.


 Once the fabric was stitched, it was put into a pot of water and brought to a boil.  I boiled it for about 20 minutes. I turned off the heat and let it cool in the pot. Once it was dry, I very carefully removed the very tight stitching around each of the rocks. When I try this technique again, I'll be sure to use looser stitching.

Here is the fabric after I have removed the rocks.


Look at all of those cute little bubbles. I thought they would really capture the spots of the Leopard's arm, especially after I added beads to them.


I draped the "arm" over a collaged piece of tree trunk. I started adding black/copper oblong beads in the centers of each bubble.  Something started happening with the way the fabric was reacting. It was starting to look like flowers.

I also added in smaller black and gold crystals to the background of the bubbles. This really made the "flowers" standout.

By the time I had finished the beading, the piece looked more like cascading flowers to me.  Oh well, at least it was inspired by the Leopard arm.

Here is a photo of the finished piece:


I added painted highlights to the "flowers" using Stewart Gill and Jaquard Metallic paints. I also ended up adding in beaded highlights to the log. I used size 11 seed beads and 6mm bugle beads.

The green background is a piece of hand-dyed raw silk that was left over from a jacket that I made this fall. I first quilted the background and then added in the painted highlights, using Stewart Gill Paints.

I will be mounting this 12"x12" piece on artist canvas.

Create Always,
Karen

Here's the second photo that was posted the beginning of September.


Watch here for the results of this photo!


Tuesday, June 30, 2015

Monday, June 29, 2015

FUN with DYE-Na-Flo Paints and Shibori Stitching

I recently taught a half day class at the Kentucky Quilt Society "Getaway" Gathering in Cave City, KY. 

The class was about using a variety of stitching and wrapping patterns, loosely based on the technique of Shibori Stitching, and painting the pieces with Dye-Na Flo paint. 

Here are a few samples of the students' work. 


Everyone had a great time and the results were spectacular.

I had them all pour any leftover paints into a quart jar, which I took home.  It looked like a muddy
mess of a color.

Just to see what would happen, I painted a canvas tote bag with the mixed up paint and left it out to dry in the sun. 


The colors separated out into a very interesting pattern.   I love the new tote and have a new idea for mixing paints together before applying them to fabric.

I bought the paints from Dharma Trading. Here's the link for anyone who is interested in exploring with them.

http://www.dharmatrading.com/paints/dye-na-flow-fabric-paint.html?lnav=paints.html

Create Always,
Karen